So, just what goes on during the Countertop Epoxy Resin Workshop? Let’s look at our latest class schedule to get an in depth view of what we cover.
Our October 2017 students learned to build an epoxy countertop from scratch, pour a mica flake epoxy floor, trowel an epoxy wall, as well as create different designs in a countertop.
Each class has DIY experts, professional contractors, and homeowners looking to improve their remodel skills. While each project will change from class to class, this is the overall flow of the week.

Day One - Onsite Countertop Build & Sample Design
The first day students are welcomed into the Countertop Epoxy headquarters. After introductions in the board room students worked on creating a countertop sample.
Then the class was taken onsite to a kitchen in the process of a remodel. Measurements were taken, and MDF boards were cut to fit the existing cabinets.
These MDF boards were then brought to the company workshop where they were joined together.
The process of creating these MDF board countertops was taught so simply, that by the end of the day, each of the 25 students said they were confident they could build their own.
Students then spent time recreating a marble countertop photo that the customer sent in for the epoxy installation. Each student created a sample board where they tried to best recreate the marble pattern to get ready for the pour of the countertop on day two.

Day Two - Epoxy Countertop Pour & Mica Flake Floor
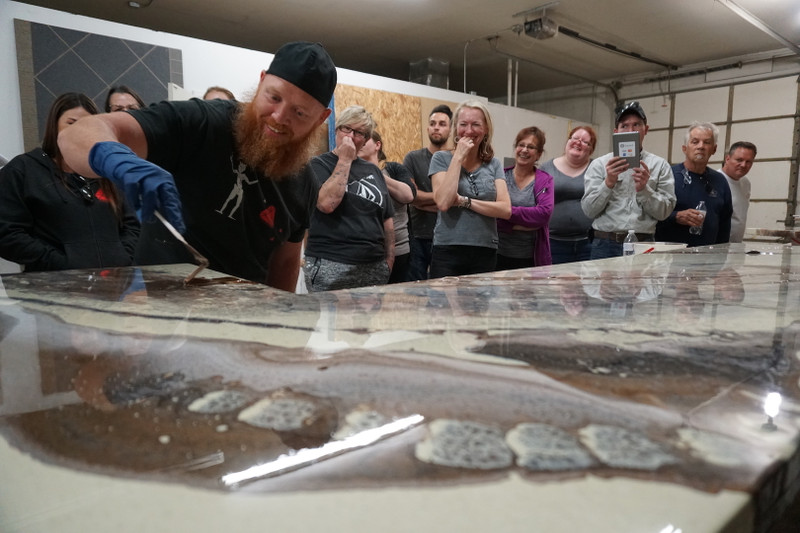
The crew starts the morning in the workshop to pour the epoxy countertop. Students helped to apply the base coat and then recreate the design into the countertop. To build real world experience the entire process is focused upon the “customer” and her desired outcome.
A dirty pour, veining, adding rust accents, and so many more techniques were applied to add color to the piece. Then safe torching practices were covered.
Once the countertop was set, the class went onsite to a garage to pour and set an epoxy mica flake floor. After mixing the floor epoxy and laying it on the garage, we tested a new technique and tossed mica flakes to the floor (this will be an upcoming training video and kit, so stay tuned.)

Day Three - Epoxy Wall and Clear Epoxy Coat on Countertop
The class met up at the workshop on the third morning to cover the epoxy countertop with the final clear coat. This final coat further strengthens the countertop and creates a glossy finish. Once complete everyone met up at the main office to install an epoxy wall.
The epoxy wall installation gave everyone a chance to get involved in the process. After troweling our wall epoxy colors were sprayed to the wall and then it was textured. We are so excited about this new wall for our office!
The rest of the afternoon was spent creating more complex samples, there were wild colors used! There were unique pieces using glitters, metallic tones, and techniques to create one of a kind sample boards that each student could take home to show as an example to future customers or to use as a reference for a larger project.

Day Four - Countertop Installation and Mica Flake Floor
The finished countertops were transported by the class to the customers kitchen, and then installed to the cabinets. This team building event yielded gorgeous results. The customer could not say enough about the piece!
Once the countertop was installed, the class went back to the garage to apply the final urethane top coat. The gold mica flake was an amazing success. We cannot wait to share the instructions with you so that anyone can recreate this in their garage.
At the end of the day, final questions were asked in the board room and our group of students graduated as Epoxy Resin certified!
The workshop students flew in from Hawaii, the east coast, and even internationally for the class. Their attentiveness and creativity made this an incredible experience for everyone. In the coming months, we look forward to what they create with their new knowledge.
If you are interested in participating in one of our upcoming workshops, sign up here. We cannot wait to have you!

